The Perfect Prime Rib Page A step by step tutorial The Beginning: Where’s The Beef? Grading:
The beef you begin with makes a difference. You should ideally begin with a piece of meat that is graded USDA Prime, though it can be difficult to obtain. Top of Choice grade will do for most purposes, so long as you can see a reasonably abundant degree of marbling (white fat running through the meat). Alas, the more calorie-laden and artery-clogging that piece of prime beef is, the better it will taste, so if you are diet conscious, indulge infrequently – but you might as well do it right when you do it at all.
Despite the extra calories, you are looking first and foremost for marbling to determine the quality of your meat. Color is not a factor unless you know for a fact that the meat is not dyed or color-fixed with chemicals. This is a more common practice in the meat packing industry than you might think, so caveat emptor. There is one other very important factor to consider when you are making your all-important prime rib purchase, and that is the touchy topic of dry aging versus cryovac. We’ll cover that in the Aging section.
The grades of meat in the United States run thus: Prime, Choice, Select, Cutter and Canner. The bottom two grades are what you find in frozen pot pie dinners, microwave burritos, hamburgers and other processed food products. Select is not very far above the bottom of the edible barrel, though some major chain stores actually brag (??) about selling it to their customers. Choice is about the lowest grade you want to consider investing your time and money into for a serious rib roast dinner.
Within each grade, there are sub-grades, and the determinations can get fairly complicated and involve things like the total percentage of trim fat on the carcass, the degree of cartilaginous fusion on the aitch bone and other factors that you don’t care about as much as the meat packer does, since you are only purchasing one cut of beef. But if you put several “Choice” grade steaks next to one another and compare, you should see a significant range in quality.
Cutting: One simple word often serves as an excellent guide to what you want your butcher to do to your piece of beef: nothing. Once it is trimmed slightly of the thick outside layer of fat and the long rib bones sawn to a manageable length, that’s it. Finis. Over. Don’t let your butcher touch those chine or “feather” bones. Leave that cap alone. Don’t even think about cutting into the meat to remove excess fat, and especially don’t cut off the rib bones unless it’s steak you really want. You want a layer of fat about 1/2 an inch thick on the outside of the meat, and the rib bones protruding about 1/2 inch from the main “eye” muscle. The point is for as little porous tissue (soft muscle meat) to be exposed when you actually cook the roast. We’ll cover more on that topic later. A properly trimmed roast looks like this:
Aging and Hanging: Why is the meat that color? It didn’t start out that way. This particular piece of meat has been hanging or aging in a meat locker under ideal conditions for six weeks. Ideal conditions mean that the temperature is maintained constantly between 36 and 38 Fahrenheit, the humidity must be fairly low, and there must be a good air flow around all sides of the meat. That’s why they call it “hanging” – they don’t strangle the cow, but they do suspend the meat so that it is well exposed to the air. Some restaurants have developed slatted wood aging racks that they use instead of meat hooks, and these can also work admirably well.
The following things must happen in order for a piece of beef to age properly. One, bacterial action takes place inside the meat that breaks down some of the tissues for greater tenderness. Two, moisture weight loss must occur, at least 10% of pre-hanging weight and preferably 15% to 18%. Three, a dry, hard, blackened crust should become visible on the exposed surfaces of the meat. Some dry white growth on the blackened surfaces is normal and safe. Occasionally you can get some other interesting colors, which can be more of a cause for worry, especially if the growth is wet, slimy or accompanied by a foul odor. That isn’t aging, that’s rotting. If this happens to your beef, you need to slice off the affected portions, bleach-clean your meat locker and start over. Sometimes you end up pitching the entire expensive side of beef in the trash, which is a painful proposition and the reason why most people let professionals handle the aging process for them.
But if you are brave and bold, it is possible to age your own beef if you can achieve the conditions of steady temperature, a dry environment and free and constant air flow. A large refrigerator that was used for no other purpose than to hang beef could be fitted with a meat hook, a fan, a vent to circulate air to the outside and a humidity gauge. The main trick to perform here is to control the humidity, which is why you absolutely need to retrofit the fridge with a fan and a vent, which are options you won’t find pre-installed.
One thing you sadly can’t do is age beef in your refrigerator. Why? Because the two primary points of aging beef are water loss to concentrate the flavor and bacterial action to tenderize the tissue. The kinds of bacteria that act on meat in a squishy wet environment are more often toxic than benign, and no dessication can take place in the wet, sealed-off environment. This is why the term “cryovac aged beef” is an oxymoron. It might be older, and if you are very lucky it might even be reasonably tender and tasty, but it is not aged. It’s a whole different critter, so to speak, and you need to understand that cryovac beef is a completely different product from dry aged beef. Cryovac is a packing and shipping technique that prolongs shelf life and may even help in some ways to tenderize the meat, but it is not compatible with aging, and vaccum packed meat does not retain moisture very well during cooking.
Since most folks aren’t prepared to set up their own meat lockers, you will ideally want to look for a piece of dry aged beef that has at least four weeks of age on it. I prefer six to eight weeks, but you may not be able to easily find a local butcher who hangs that long. Four will do, or even two in a pinch, so long as it was cut directly from a side of beef and did not come to the store in a cryovac package. Ask. The difference in quality is well worth it.
Size Does Matter: Although a two-bone roast looks generous if you’re only feeding two people, keep in mind that the smaller cuts do not cook as well or evenly as larger pieces. I like to buy a minimum of three bones and often four, and either expect to feast on the leftovers or plan to invite friends for dinner.
The Test of Patience: Cooking
Salt Jacketing: Once you bring home your beautiful roast, you won’t want to wait to eat it. But patience generally pays off, especially in prime rib. Spray the exposed meat surfaces with water or balsamic vinegar, and coat them in flake or rock salt. Margarita salt works admirably well. Your object is a solid crust of salt entirely covering and protecting the meat. No salt is necessary where the meat is already protected by fat, but a light sprinkle will do for savor. You can add herbs or other savory rubs at your discretion before the salt cover goes on, but you must make sure that an unbroken crust can form. Don’t use regular salt, as the fine grains are not suitable for forming the protective crust. You’ll only get salty meat. Here’s a good picture.
Trimming: It is your choice whether or not to trim off that hard, blackened crust on a really well aged piece of beef. I don’t, and I think I get better results that way. If you have any concern about mold, particularly if you are in a sensitive state of health or have known allergies, most definitely do ask the butcher to do a “face cut” if he or she hasn’t done so already, to remove the outer crust. I find that it improves the quality of the roast, and has a delightfully full, almost gamy flavor when the cooking is finished. Let your own palate and common sense be your guide.
Into The Oven: Beef reaches the ideal tenderness when it is slowly brought up to temperature, according to the kitchen scientist who wrote the fascinating work “The Curious Cook”, Harold McGee. I have to agree with him, so I’m suggesting you set your oven to 250F and plan to spend some time waiting for it. If you feel like getting fancy, and you’re willing to constantly supervise, you can place a small ceramic dish containing about a tablespoon of damp aromatic wood chips into the oven and allow them to smoke. Be sure that no drippings can fall onto the smoking plate, or you may end up with a serious fire.
Cooking Time: Depending on the size of the roast, its density from moisture weight loss and its temperature on being placed into the oven, it can take a varying amount of time to reach the correct internal temperature. Other factors can also influence cooking time, such as the thickness of the overlaying fat, the proportion of bone, whether or not the “cap” is left on the meat, and of course the accuracy of your oven. Charts that give a number of minutes per pound can only serve as a rough and poor guideline, since this kind of guesswork is no good when you have a $50 or $100 hunk of meat and your reputation as a good cook on the line. There is absolutely no substitute for a thermometer to determine whether or not your prime rib roast is done.
Temperature, Temperature, Temperature! There is one way and one way only to cook a prime rib to the perfect degree of doneness that you desire, through and through. That is to apply heat slowly, steadily and evenly until the internal temperature of the meat reaches a specific degree, within a tolerance of one or two degrees. That is a narrow window, so you will need to invest some small fraction of what you spent on the roast on a good instant-read thermometer, or better yet a digital thermometer with an oven-safe probe that is designed to remain inside the roast and tell you at any given second what the exact temperature of its interior is. The former should cost no more than $10, though the latter may set you back $50 or more. A good thermometer looks like this:
For a classically juicy, red, rare piece of meat, remove the roast from the oven when the internal temperature reaches 110. Lovers of ultra-rare, super tender beef that quivers like jelly may pull their ribs at 105. If you are a fan of better done beef, pull at 115. Gods help you if you pull any later than 120, as this is the way to dry, overdone meat.
Patience Pays: Remove the salt crust with a basting brush or a paper towel, but don’t cut into the meat. Keep an eye on the thermometer readings, as the internal temperature will continue to climb. You’ll gain as much as 10 degrees this way. Let the meat stand until the temperature has levelled off, which should take from five to fifteen minutes depending on the size of the roast.
Using a long, thin, sharp knife, make one cut to slice off the chine or feather bones. This is what chine or “feather” bones look like:
Once they are removed, set them aside for leisurely nibbling later on. Some of the best meat in the world is sticking to these bones, meltingly tender and sweet with the slightly gelatinous tissue that holds them together, so don’t let them go to waste. With economical motions of the knife, slice off steaks at the desired thickness. If you plan to keep the roast a few days, you may prefer to cut only as far as you need to into the roast to seperate a few steaks at a time from the rib and chine bones, like this:
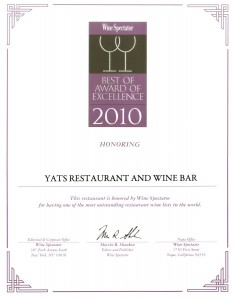
One of 650 restaurants in the world to win Wine Spectator Best of Awards of Excellence for great restaurant wine list
What would prime rib be without its classic accompaniments? Rather than settling for the watered-down canned version of the traditional horseradish sauce, make your own. It couldn’t be simpler, once you manage to obtain the fresh horseradish root. Peel a thick, juicy section of the root (about an inch, or double that if you like it good and hot), and drop it into the blender or food processor along with half a cup of thick whipping cream. In a few minutes, the horseradish will grate and the cream will whip, and you will find the resulting thick concoction to be very satisfying indeed. If it proves too strong, and fresh horseradish often does, you can always add more whipping cream or fresh, thick sour cream to the mix.
Some other good side dishes include a crisp salad with plenty of juicy, ripe tomatoes and chunks of creamy blue cheese, fresh roasted ears of corn, baked potatoes with plenty of sour cream and savory portobello mushrooms grilled with balsamic vinegar and herbs. One of my favorite vegetable accompaniments is Portobello Towers. Marinate the caps of portobello mushrooms along with some thick, circular slices of eggplant, squash and tomatoes in olive oil and wine vinegar for an hour or so. Roast them slowly in the oven until tender, removing the tomatoes very early on and the rest of the vegetables as they are done, and assemble them into stacked “Towers”. You can slice larger portobello mushroom caps in half horizontally, leaving two decorative and delicious circles to stack on the tower. Some excellent additions include avocado, slices of boiled waxy potatoes, fresh or sun-dried tomatoes and goat cheese.
Don’t forget to warm up the fresh, crusty sourdough bread in the oven, and dig in with a hearty appetite. Enjoy!
Source: http://baygourmet.tripod.com/primerib.html
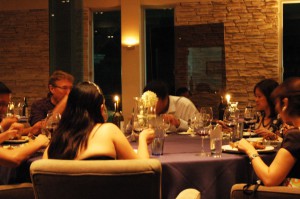
More and more, frequent diners from Manila, Angeles City, Subic and other major cities in Asia travel to North Luzon Pampanga Clark Freeport to enjoy good food in a romantic fine dining restaurant. On their list of requirements for the best restaurant in Clark Pampanga is a good wine list that not only offers a wide selection of wines from different countries but also older vintages that can be enjoyed now and not ten years later. Classic fine dining is the experience that guests of Clark Philippines’ Yats Restaurant & Wine Bar offers to their guests. Although this is an upscale fine dining establishment, families find this famous restaurant of Clark Pampanga to be very children friendly.
Competition for a spot in the best restaurants in Manila and Pampanga heats up as frequent diners look for more than just chic decoration and a fancy menu. Top restaurants in Manila are offering not only good food and a cozy ambience but also a wine list that beats the competition. Restaurants in Angeles City and Clark Pampanga are rising to the occasion, offering not only good food and excellent service but also fine vintage wines. Cozy romantic dining rooms also help make these fine dining restaurants in Clark Pampanga a notch above many other restaurants in Manila, Subic and other big cities of the Philippines. The best restaurant in Clark Pampanga must not only offer good food and excellent service, but also good ambience and a great wine list.
Although frequently visited by business executives and tourists visiting Clark and Angeles City Pampanga, this top rated fine dining restaurant located in the heart of Clark Freeport inside Mimosa Leisure golf and casino estate is also a popular venue and dining outlet for group dinners, private functions and small events. Fine dining in Manila Philippines, wine and dine at Yats Restaurant & Wine Bar, great wine list, a really cool place to wine and dine and a great night out place for group dinners also. The good atmosphere of its wine bar makes this one of the best places in Clark Pampanga to visit, drink and relax after a day at the Mimosa golf course or a busy day at work in Angeles City, Subic, San Fernando or Clark Freeport Philippines.
Fine dining Yats Restaurant offers privacy dining facilities for business and social needs. It is a short way out of Manila. Many frequent diners prefer to go out of town to enjoy an evening in a cozy restaurant, good food and fine vintage wine.
For comments, inquiries and reservations click on Click here for inquiry and reservations
Restaurant@Yats-International.com
(045) 599-5600
0922-870-5178
0917-520-4401
Ask for Pedro and Rechel
Getting to this fine dining restaurant of Angeles City Clark Freeport Zone Pampanga Philippines
How to get to this fine-dining restaurant in Clark Philippines? Once you get to Clark Freeport, go straight until you hit Mimosa. After you enter Mimosa, stay on the left on Mimosa Drive, go past the Holiday Inn and Yats Restaurant (green top, independent 1-storey structure) is on your left. Just past the Yats Restaurant is the London Pub.
Yats Restaurant & Wine Bar
Mimosa Drive past Holiday Inn, Mimosa Leisure Estate,
Clark Freeport Zone, Pampanga, Philippines 2023
Manila Sales Office
3003C East Tower, Phil Stock Exchange Center,
Exchange Rd Ortigas Metro Manila, Philippines 1605
(632) 637-5019 0917-520-4393 Rea or Chay
For any assistance in planning and organizing a wedding ceremony, indoor or outdoor garden reception or to find other wedding service providers, Click here to contact us click here
For assistance in hotel and resort bookings in Clark, Pampanga, Philippines, log on to
http://www.HotelClarkPhilippines.com
To buy wine in Manila, Pampanga, Angeles City, Clark or Subic please log on to http://www. ClarkWineCenter.com
To inquire with the highly recommended beach resort hotel in Clark Pampanga visit http://www.ClearwaterPhililippines.com
For more information about Clark, Pampanga, Philippines log on to
http://www.ClarkPhilippines.com
If this article about Clark is useful to you, please click here to contact us to tell us what more you wish to know about this article or Clark Philippines, which can be something about Clark investment, about Clark resorts, about Clark Swimming and Leisure or simply general news about Clark.
Please send questions to Editor@ClarkPhilippines.com. Leave your name, email address, contact numbers and we will get back to you as soon as possible. Information received will not be disclosed.

